How Big Csan You Upload to Streamlabs
Although Streamlabs Desktop is known in particular for its alive streaming capabilities, it is too possible to record your calculator screen also. This tutorial will cover the settings you can optimize to achieve the all-time quality recording.
Learn more about using Streamlabs Desktop to tape your screen past visiting our website.
Please note, this tutorial volition specifically cover the best settings to tape just. Many of the settings nosotros hash out hither will have to exist adjusted for operation and quality if you want to alive stream and record at the same time. With that existence said let's get into it.
Audio Settings
Before we get into which video settings you can adjust, nosotros beginning want to make sure y'all are capturing the right audio.
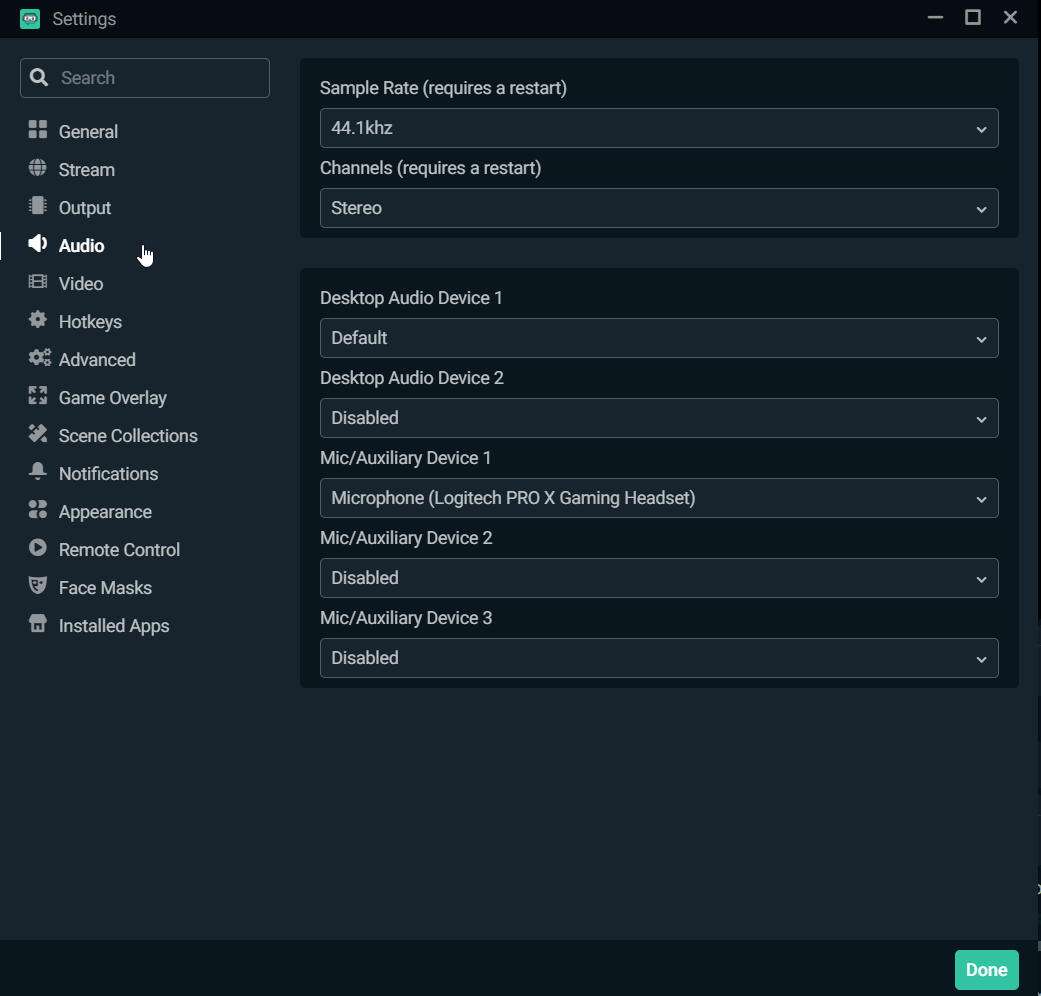
If you have a microphone connected to your computer, Streamlabs Desktop should automatically discover it and show it on the audio mixer.

To change which microphone is beingness captured, click on the settings cog in the lower left-paw corner of Streamlabs Desktop, open up the audio settings, and pick a different microphone.
Recording Sound Tracks
When you record content on Streamlabs Desktop, you also have the option to assign certain sound inputs to specific tracks. This is helpful subsequently when you are editing to take desktop audio on i track while your ain microphone is on another.
To assign audio inputs to specific tracks, first, open the Advanced Audio Settings by clicking on the settings cog in the audio mixer.
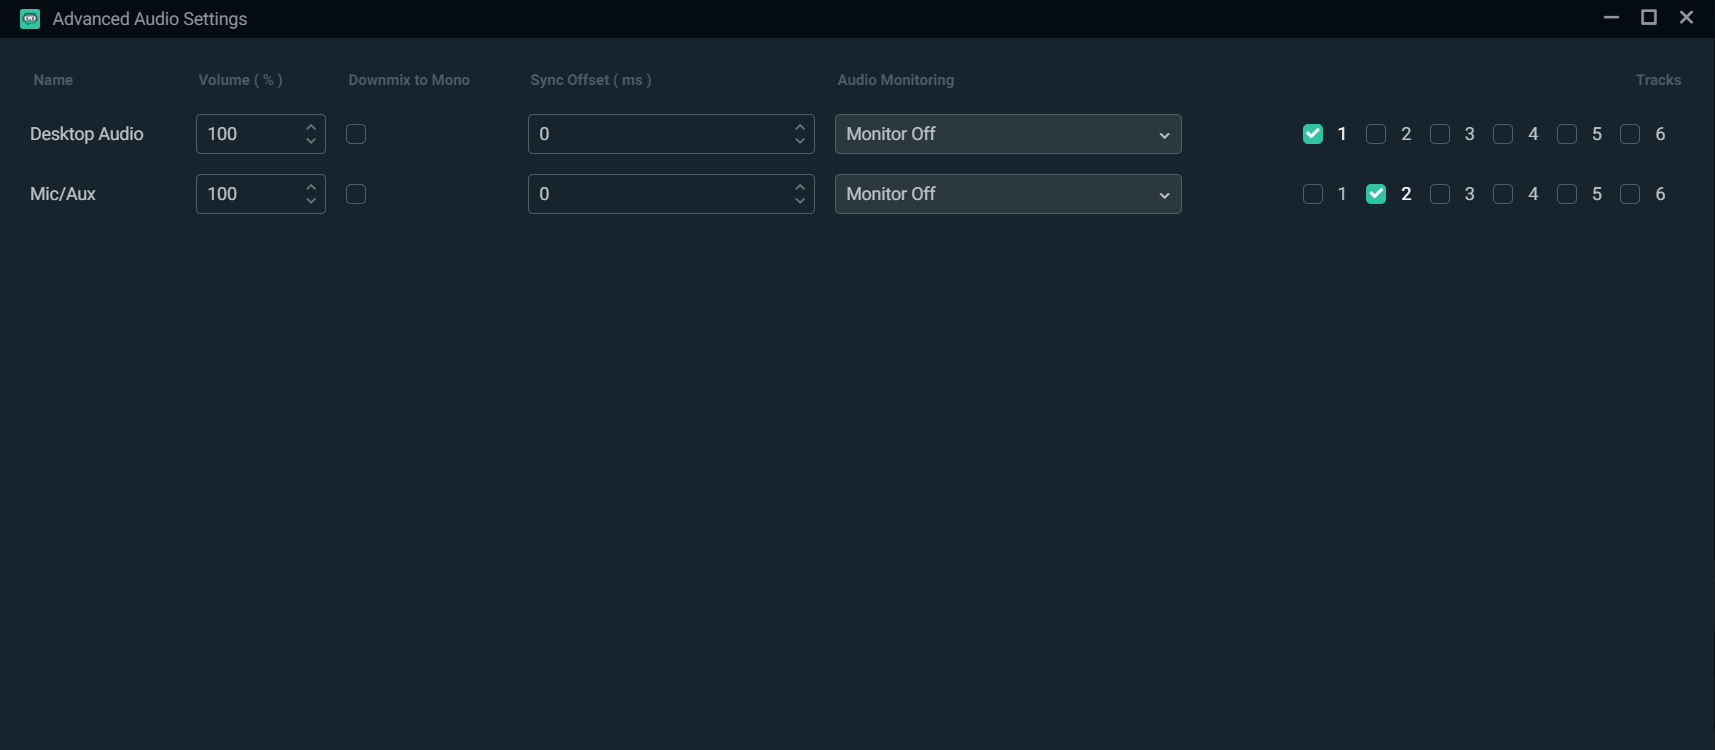
All six tracks will be checked by default, meaning all of your sound inputs will be combined. In most cases, yous'll want to give each sound input its own specific track. Yous can also combine all of your audio into one runway if y'all wish. In this case, our desktop sound is assigned to track ane, while our mic sound is assigned to rails two.
Next, adjust the output settings for your recording.
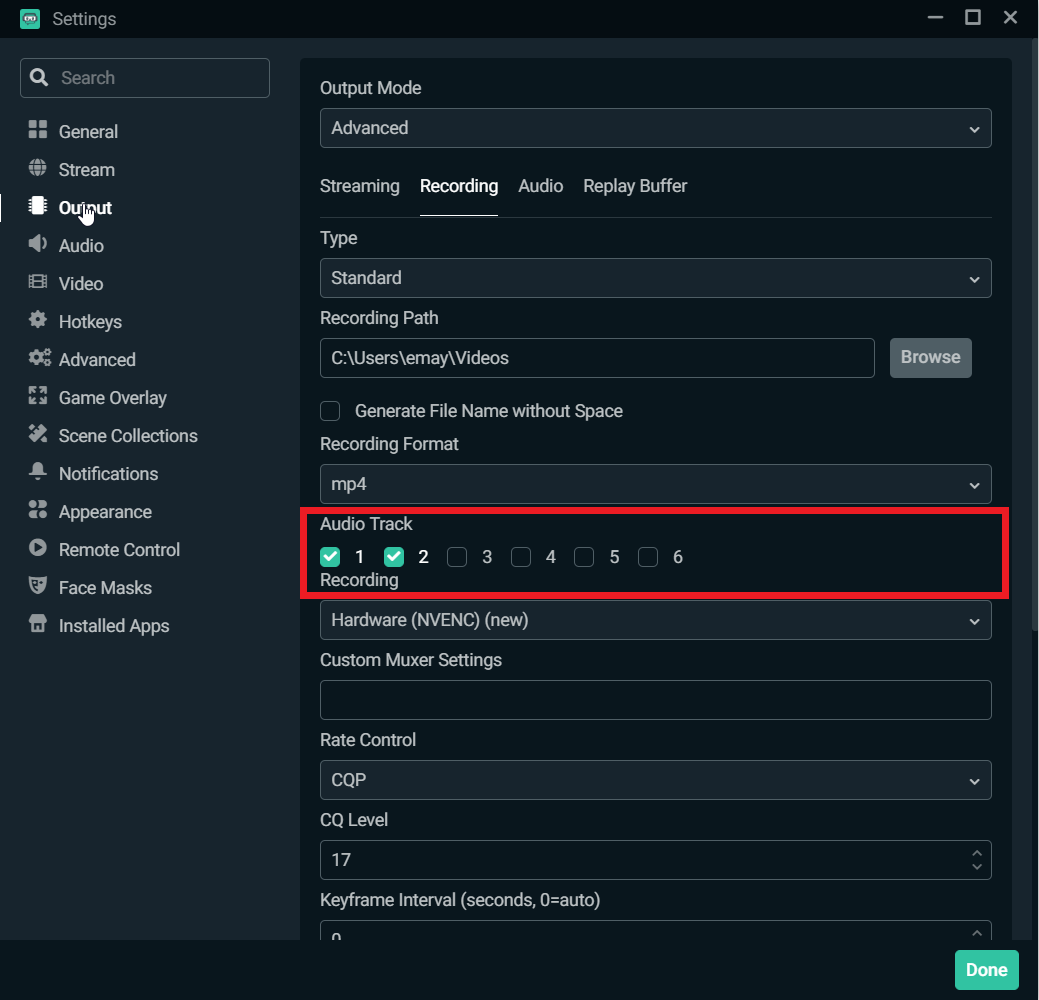
Adjust the number of tracks in this section depending on how many audio inputs you've assigned in the Advanced Audio Settings. Now, when you upload your file to your editing software, 2 audio tracks will announced — one for your desktop sound and ane for your microphone audio.
Video Settings
Now, permit'southward get into the video settings yous should adjust to go the best quality picture.
Navigate to the video settings by clicking on the settings cog in the lower left-manus corner of Streamlabs Desktop and clicking on "video".
Base (Canvas) Resolution
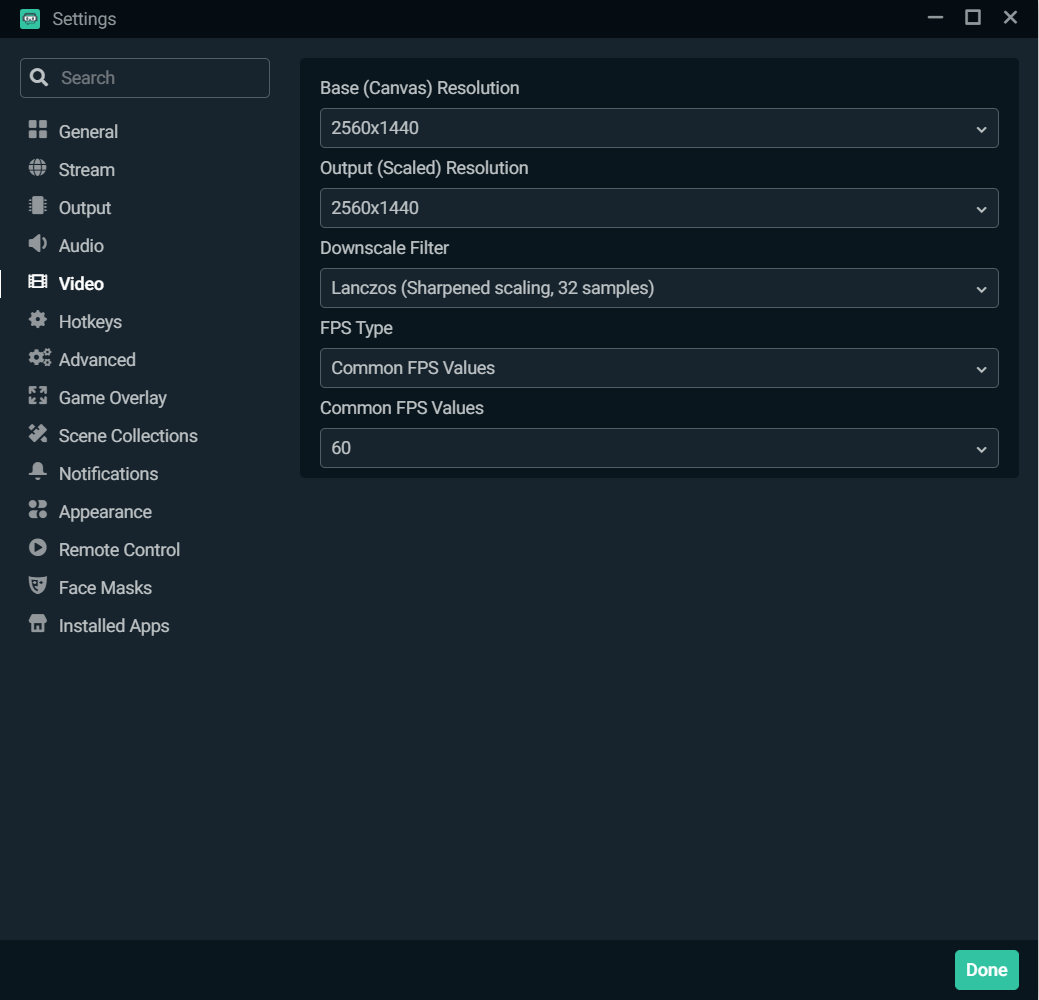
For recording gameplay, information technology is recommended that your base of operations resolution match your monitor's resolution. In my example, it 2560x1440.
Output (Scaled) Resolution
For recording gameplay, it is recommended you lot cull the highest quality output resolution. In my case, information technology 2560x1440.
It is recommended that you monitor the functioning of your computer while you record. If you notice that your computer is struggling, attempt lowering the output resolution.
Downscale Filter
It is recommended to choose Lanczos every bit your downscale filter, as this provides the best quality at the cost of slightly more CPU.
FPS
Nosotros recommend recording in threescore FPS in well-nigh cases, especially for gameplay that involves a lot of action. If you are playing a board game or something with a more static image, you tin can probably get away with 30 FPS, only in general, try to tape more frames if you can.
Output Settings
To adjust the output settings for your recording, by clicking on the settings cog in the lower left-manus corner of Streamlabs Desktop and clicking on "output".
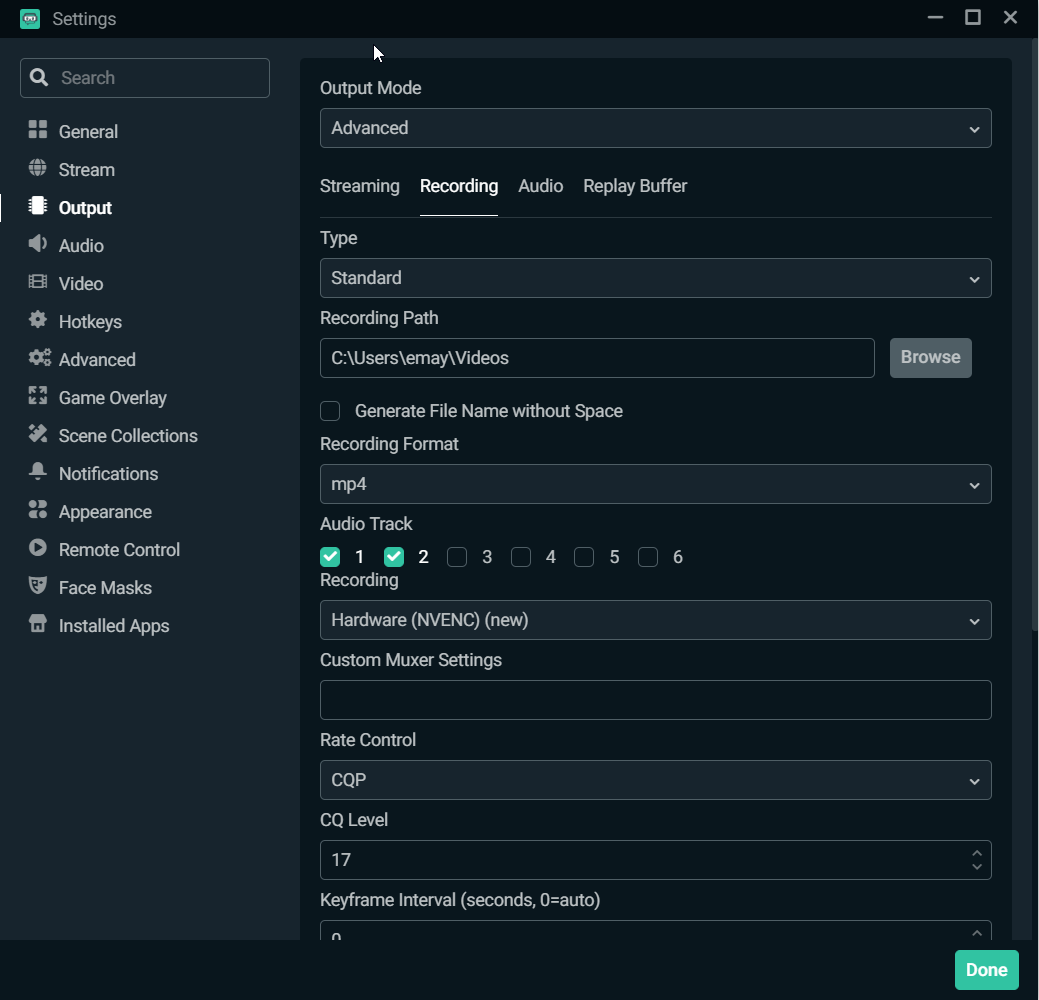
Recording Path
Pick the destination you'd similar your recording to announced.
Recording Format
In most cases, nosotros recommend recording in the mp4 format.
Recording Encoder
When it comes to encoders, there are ii types: software (x264) and hardware (NVENC). The software encoder (x264) will use your CPU to encode video, while hardware encoders similar NVENC will offload the encoding process to your GPU. If you lot are using an NVIDIA graphics menu we recommend you record with NVENC.
Rate Control
Nosotros recommend choosing CQP, which stands for Constant Quantisation Parameter. This will assistance control the corporeality of compression and video quality for whatever given frame you lot encounter.
If yous are using the X264 encoder we recommend choose CRF for your rate control
CQ Level
Large values hateful that there will be higher quantization, more pinch, and lower quality. Lower values mean the contrary. We recommend starting at 17 and adjusting from there depending on the operation of your computer.
Keyframe Interval
You leave this setting as 0.
Presets
For recording purposes, we recommend choosing the highest setting, "Max Quality". Of grade, if you encounter performance issues, please feel gratis to suit this setting accordingly.
Profile
You tin can leave this setting on "loftier".
You can leave the rest of the settings in this department on their default states as they won't have much impact on quality.
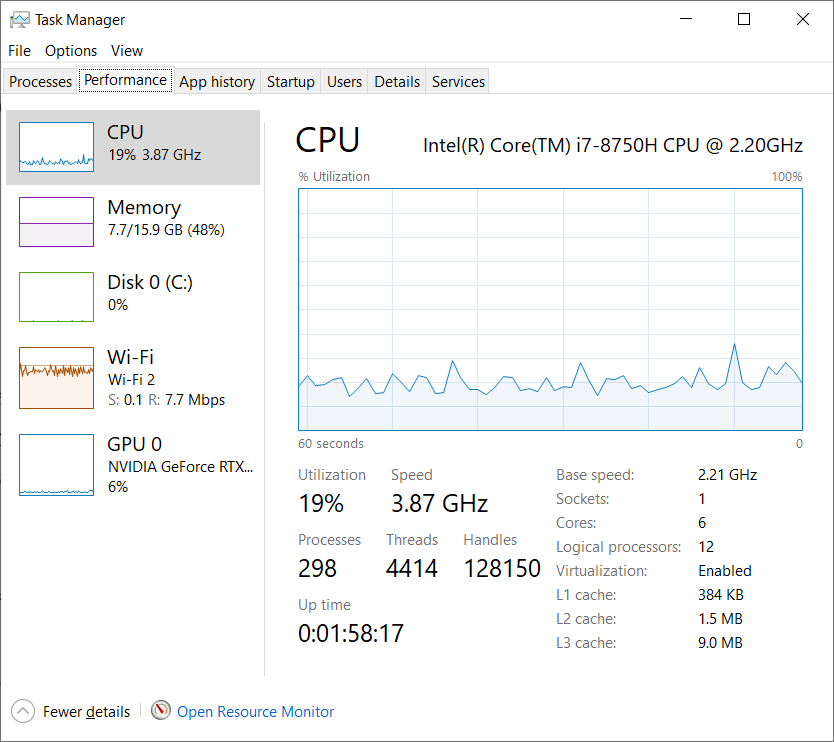
Exam your Settings
At present that y'all've adapted the video and recording output settings to optimize for quality, you testify now examination to make certain your calculator tin handle the performance increases. Press Control + Shift +ESC to bring upward the job manager and click on "performance". Effort recording gameplay with Streamlabs Desktop and monitor the functioning on this screen. If your CPU usage is besides high endeavor adjusting the settings outlined above to optimize for your computer.
And that wraps upwardly the settings you can conform to get the best quality recording in Streamlabs Desktop.
If you lot have whatsoever questions or comments, delight let us know. Remember to follow united states of america on Twitter, Facebook, Instagram, and YouTube.
You can download Streamlabs Desktop here.
Source: https://streamlabs.com/content-hub/post/how-to-record-on-streamlabs-desktop-best-settings
Post a Comment for "How Big Csan You Upload to Streamlabs"